Healthchecks


Healthchecks is a cron job monitoring service. It listens for HTTP requests and email messages ("pings") from your cron jobs and scheduled tasks ("checks"). When a ping does not arrive on time, Healthchecks sends out alerts.
Healthchecks comes with a web dashboard, API, 25+ integrations for delivering notifications, monthly email reports, WebAuthn 2FA support, team management features: projects, team members, read-only access.
The building blocks are:
- Python 3.12+
- Django 6.1
- PostgreSQL, MySQL or MariaDB
Healthchecks is licensed under the BSD 3-clause license.
Healthchecks is available as a hosted service at https://healthchecks.io/.
A Dockerfile and pre-built Docker images are available.
Screenshots:
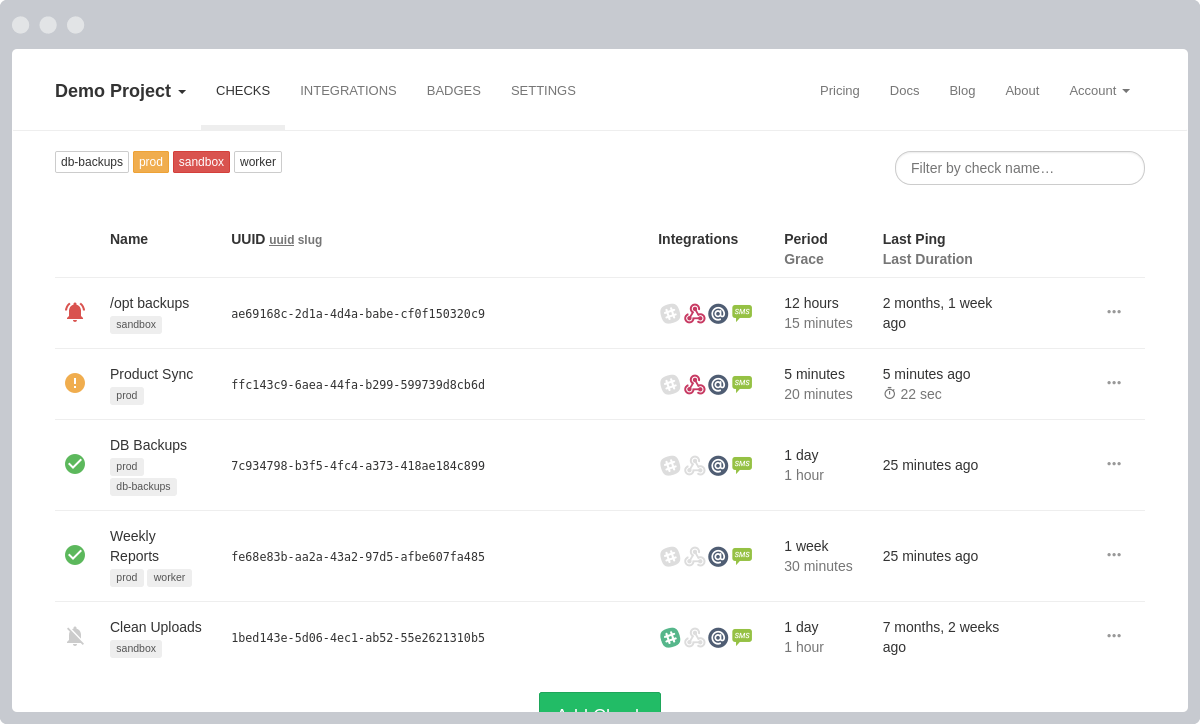
The "My Checks" screen. Shows the status of all your cron jobs in a live-updating dashboard.
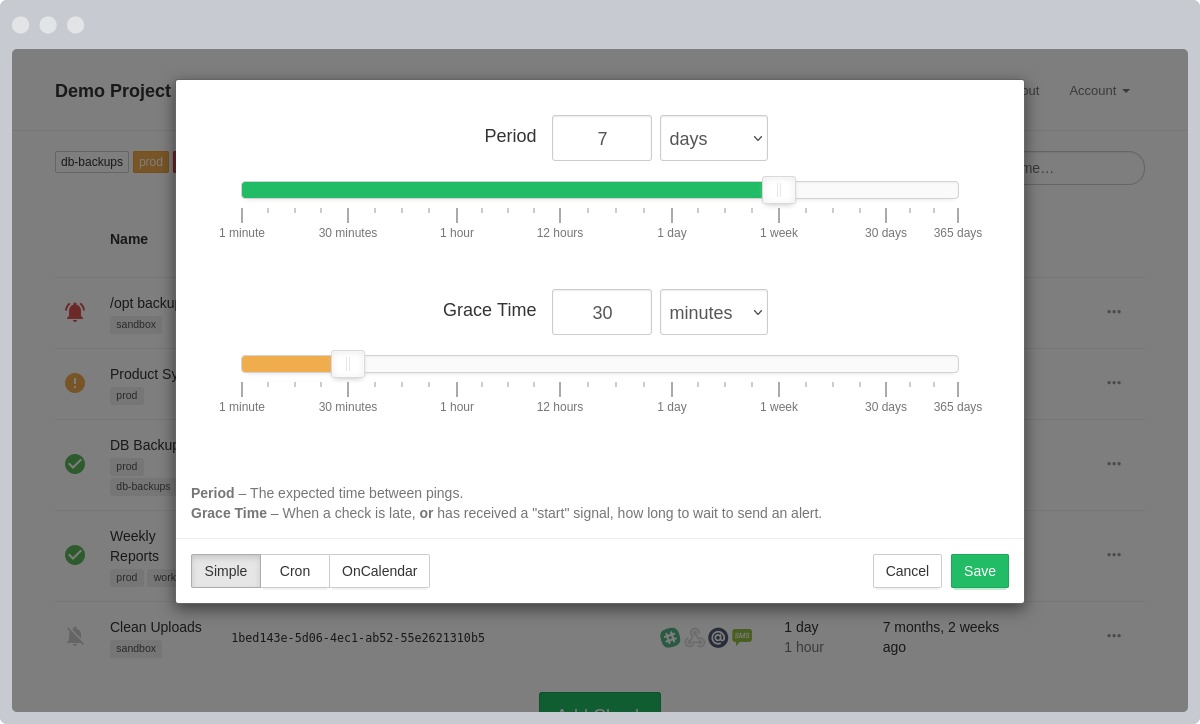
Each check has configurable Period and Grace Time parameters. Period is the expected time between pings. Grace Time specifies how long to wait before sending out alerts when a job is running late.
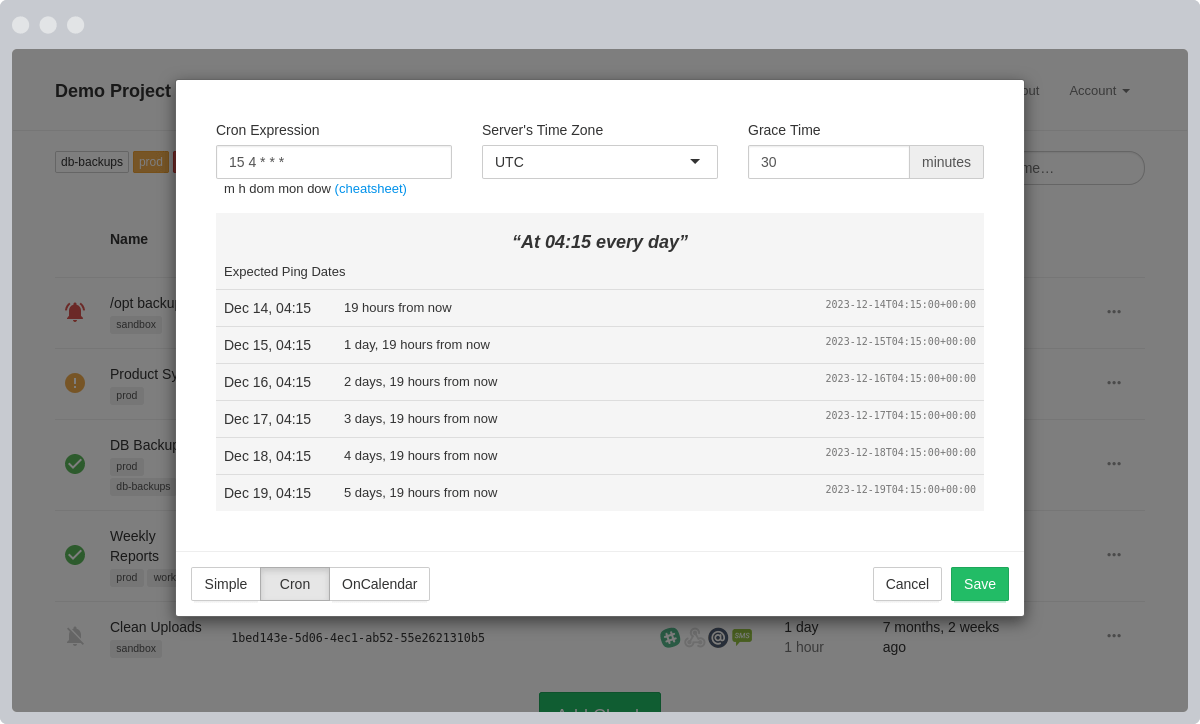
Alternatively, you can define the expected schedules using a cron expressions. Healthchecks uses the cronsim library to parse and evaluate cron expressions.
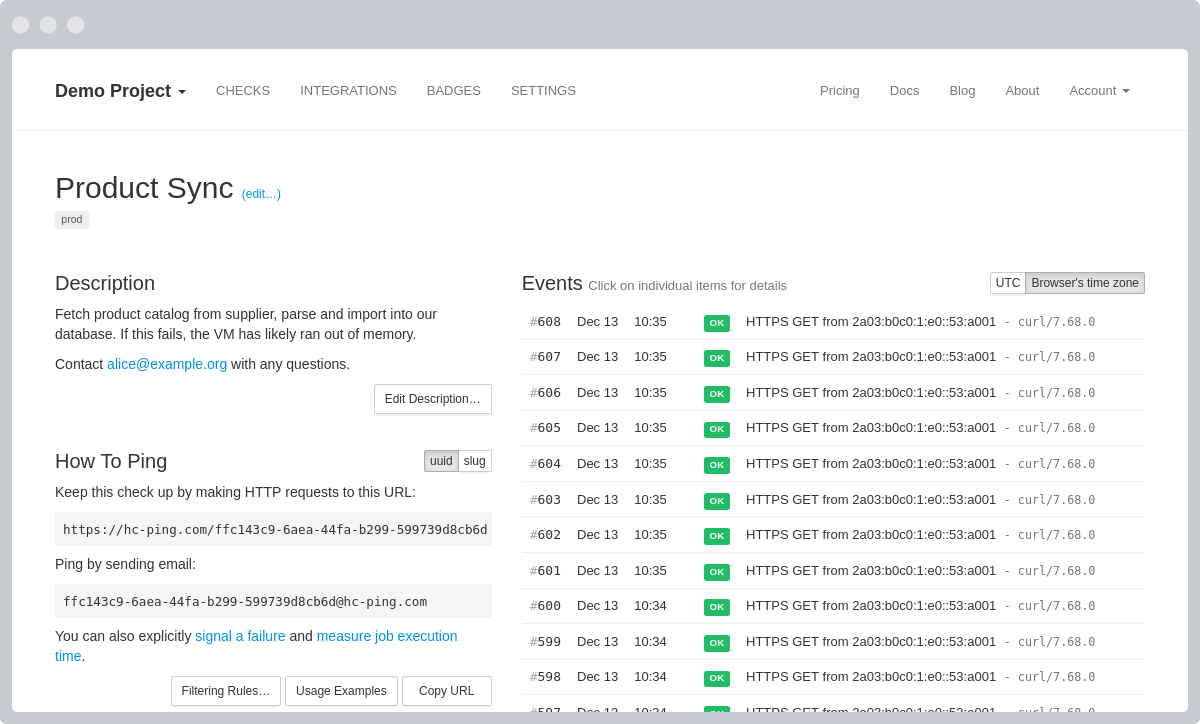
Check details page, with a live-updating event log.
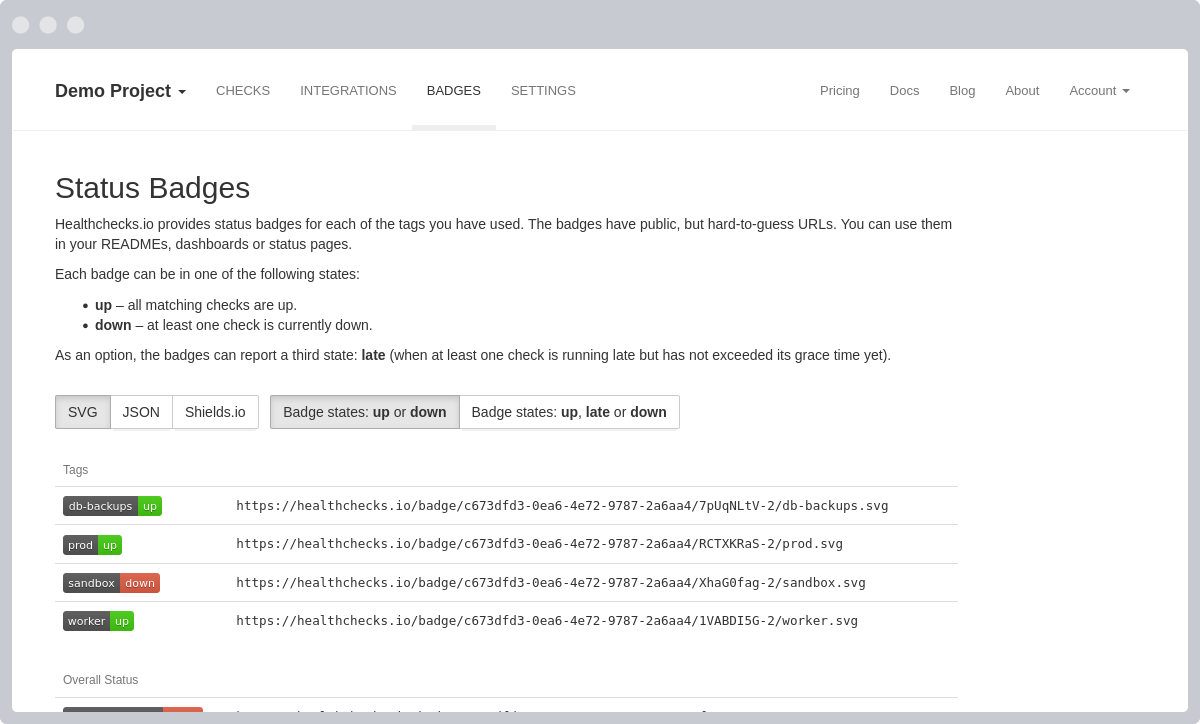
Healthchecks provides status badges with public but hard-to-guess URLs. You can use them in your READMEs, dashboards, or status pages.
Setting Up for Development
If you are planning to developing Healthchecks, please read CONTRIBUTING.md.
To set up Healthchecks development environment:
Install dependencies (Debian/Ubuntu):
sudo apt update
sudo apt install -y python3-venv
Prepare directory for project code and virtualenv. Feel free to use a different location:
mkdir -p ~/webapps
cd ~/webapps
Prepare virtual environment (with virtualenv you get pip, we'll use it soon to install requirements):
python3 -m venv .venv
source .venv/bin/activate
Check out project code:
git clone https://github.com/healthchecks/healthchecks.gitInstall requirements (Django, ...) into virtualenv:
pip install -r healthchecks/requirements.txt -r healthchecks/requirements-dev.txtmacOS only - pycurl needs to be reinstalled using the following method (assumes OpenSSL was installed using brew):
export PYCURL_VERSION=`cat requirements.txt | grep pycurl | cut -d '=' -f3`
export OPENSSL_LOCATION=`brew --prefix openssl`
export PYCURL_SSL_LIBRARY=openssl
export LDFLAGS=-L$OPENSSL_LOCATION/lib
export CPPFLAGS=-I$OPENSSL_LOCATION/include
pip uninstall -y pycurl
pip install pycurl==$PYCURL_VERSION --compile --no-cache-dir
Create database tables and a superuser account:
cd ~/webapps/healthchecks
./manage.py migrate
./manage.py createsuperuser
With the default configuration, Healthchecks stores data in a SQLite file
hc.sqlitein the checkout directory (~/webapps/healthchecks).Run tests:
./manage.py testRun development server:
./manage.py runserver
The site should now be running at http://localhost:8000.
To access Django administration site, log in as a superuser, then
visit http://localhost:8000/admin/
Configuration
Healthchecks reads configuration from environment variables. See the full list of configuration parameters you can set via environment variables.
In addition, Healthchecks reads settings from the hc/local_settings.py file if it
exists. You can set or override any standard Django setting
in this file. You can copy the provided hc/local_settings.py.example as
hc/local_settings.py and use it as a starting point.
If a setting is specified both as environment variable and in hc/local_settings.py,
the latter takes precedence.
Accessing Administration Panel
Healthchecks comes with Django's administration panel where you can perform administrative tasks: delete user accounts, change passwords, increase limits for specific users, inspect contents of database tables.
To access the administration panel,
- if you haven't already, create a superuser account:
./manage.py createsuperuser - log into the site using superuser credentials
- in the top navigation, "Account" dropdown, select "Site Administration"
Sending Emails
Healthchecks must be able to send email messages, so it can send out login links and alerts to users. Specify your SMTP credentials using the following environment variables:
Implicit TLS (recommended):
DEFAULT_FROM_EMAIL = "[email protected]"
EMAIL_HOST = "smtp.example.org"
EMAIL_PORT = 465
EMAIL_HOST_USER = "example-username"
EMAIL_HOST_PASSWORD = "example-password"
EMAIL_USE_TLS = False
EMAIL_USE_SSL = True
Port 465 should be the preferred method according to RFC8314 Section 3.3: Implicit TLS for SMTP Submission. Be sure to use a TLS certificate and not an SSL one.
Explicit TLS:
DEFAULT_FROM_EMAIL = "[email protected]"
EMAIL_HOST = "smtp.example.org"
EMAIL_PORT = 587
EMAIL_HOST_USER = "example-username"
EMAIL_HOST_PASSWORD = "example-password"
EMAIL_USE_TLS = True
Healthchecks use these environment variables to construct the settings.MAILERS
dictionary (a standard Django setting, docs).
Receiving Emails
Healthchecks comes with a smtpd management command, which starts up a
SMTP listener service. With the command running, you can ping your
checks by sending email messages
to [email protected] email addresses.
Start the SMTP listener on port 2525:
./manage.py smtpd --port 2525
Send a test email:
curl --url 'smtp://127.0.0.1:2525' \
    --mail-from '[email protected]' \
    --mail-rcpt '[email protected]' \
    -F '='
Sending Alerts and Reports
Healthchecks comes with a sendalerts management command, which continuously
polls database for any checks changing state, and sends out notifications as
needed. Within an activated virtualenv, you can manually run
the sendalerts command like so:
./manage.py sendalerts
In a production setup, you will want to run this command from a process manager like systemd or supervisor.
Healthchecks also comes with a sendreports management command which
sends out monthly reports, weekly reports, and the daily or hourly reminders.
Run sendreports without arguments to run any due reports and reminders
and then exit:
./manage.py sendreports
Run it with the --loop argument to make it run continuously:
./manage.py sendreports --loop
Database Cleanup
Healthchecks deletes old entries from api_ping, api_flip, and api_notification
tables automatically. By default, Healthchecks keeps the 100 most recent
pings for every check. You can set the limit higher to keep a longer history:
go to the Administration Panel, look up user's Profile and modify its
"Ping log limit" field.
Healthchecks also provides management commands for cleaning up
auth_user (user accounts) and api_tokenbucket (rate limiting records) tables,
and for removing stale objects from external object storage.
Remove user accounts that are older than 1 month and have never logged in:
./manage.py pruneusersRemove old records from the
api_tokenbuckettable. The TokenBucket model is used for rate-limiting login attempts and similar operations. Any records older than one day can be safely removed../manage.py prunetokenbucketRemove old objects from