rustunnel





The open-source tunnel that scales with you. Don't pay for idle time. Secure, Rust-fast, and Pay-as-you-go.
Expose local services through a public server over encrypted WebSocket connections with TLS termination, HTTP/TCP proxying, a live dashboard, Prometheus metrics, and audit logging.
You can self-host or use our managed service.
Using an AI agent? rustunnel ships an MCP server — one-click setup for Cursor (then add your API token):

For Claude Code, Claude Desktop, Windsurf, and others, see the agent integration guide or the agent manual at rustunnel.com/agents.md.
Table of Contents
- Hosted service
- Architecture overview
- Requirements
- Local development setup
- Production deployment (Ubuntu / systemd)
- 1 — Install dependencies
- 2 — Build release binaries
- 3 — Create system user and directories
- 4 — Install the server binary
- 5 — Create the server config file
- 6 — TLS certificates (Let's Encrypt + Cloudflare)
- 7 — Set up systemd service
- 8 — Open firewall ports
- 9 — Verify the server is running
- Updating the server
- Docker deployment · full guide
- Client configuration
- Port reference
- Config file reference (server)
- REST API
- AI agent integration (MCP server)
- Monitoring
- Roadmap
- Contributing
- License
- Contact
Hosted service
You can use rustunnel without running your own server. We operate a global fleet of public edge servers that you can connect to immediately.
Available regions
| Region ID | Server | Location | Control plane | Status |
|---|---|---|---|---|
eu |
eu.edge.rustunnel.com |
Helsinki, FI | :4040 |
Live |
us |
us.edge.rustunnel.com |
Hillsboro, OR | :4040 |
Live |
ap |
ap.edge.rustunnel.com |
Singapore | :4040 |
Live |
The client auto-selects the nearest region by default. Use --region to connect to a specific one. The legacy address edge.rustunnel.com is a CNAME to eu.edge.rustunnel.com and will continue to work for backward compatibility.
Getting an auth token
Sign up for a free account at rustunnel.com — no waiting list, no manual approval.
- Create an account at rustunnel.com
- Go to Dashboard → API Keys and create a token
- Copy the token — it is shown only once
Plans:
| Plan | Price | Tunnels | Custom subdomains | TLS/HTTPS |
|---|---|---|---|---|
| Free | $0 | Up to 3 | — | ✓ |
| Pay-as-you-go | $3/mo minimum + $0.10/GB | Unlimited | ✓ | ✓ |
| Self-host | Free (run your own server) | Unlimited | ✓ | ✓ |
The free plan is a great way to get started. Upgrade to pay-as-you-go from your dashboard whenever you need custom subdomains or unlimited tunnels.
Quick start with the hosted server
Once you have a token, run the setup wizard:
rustunnel setup
# Region [auto / eu / us / ap / self-hosted] (default: auto): (press Enter)
#   Selecting nearest region… eu 12ms · us 143ms · ap 311ms · → eu (Helsinki, FI) 12ms
#   Server set to: eu.edge.rustunnel.com:4040
# Auth token: <paste your token>
Then expose a local service:
# HTTP tunnel — auto-selects the nearest region
rustunnel http 3000

# Connect to a specific region
rustunnel http 3000 --region eu

# Custom subdomain
rustunnel http 3000 --subdomain myapp

# TCP tunnel — e.g. expose a local database
rustunnel tcp 5432

# UDP tunnel — e.g. expose a game server
rustunnel udp 27015

# P2P tunnel — expose a service to another rustunnel client
rustunnel p2p 27015 --name my-game --secret "shared-secret"

# P2P tunnel — connect to a peer's service
rustunnel p2p 8000 --target my-game --secret "shared-secret"
The client prints the public URL as soon as the tunnel is established:
  Selecting nearest region… eu 12ms · us 143ms · ap 311ms → eu (Helsinki, FI) 12ms
✓ tunnel open  https://abc123.eu.edge.rustunnel.com
Architecture overview
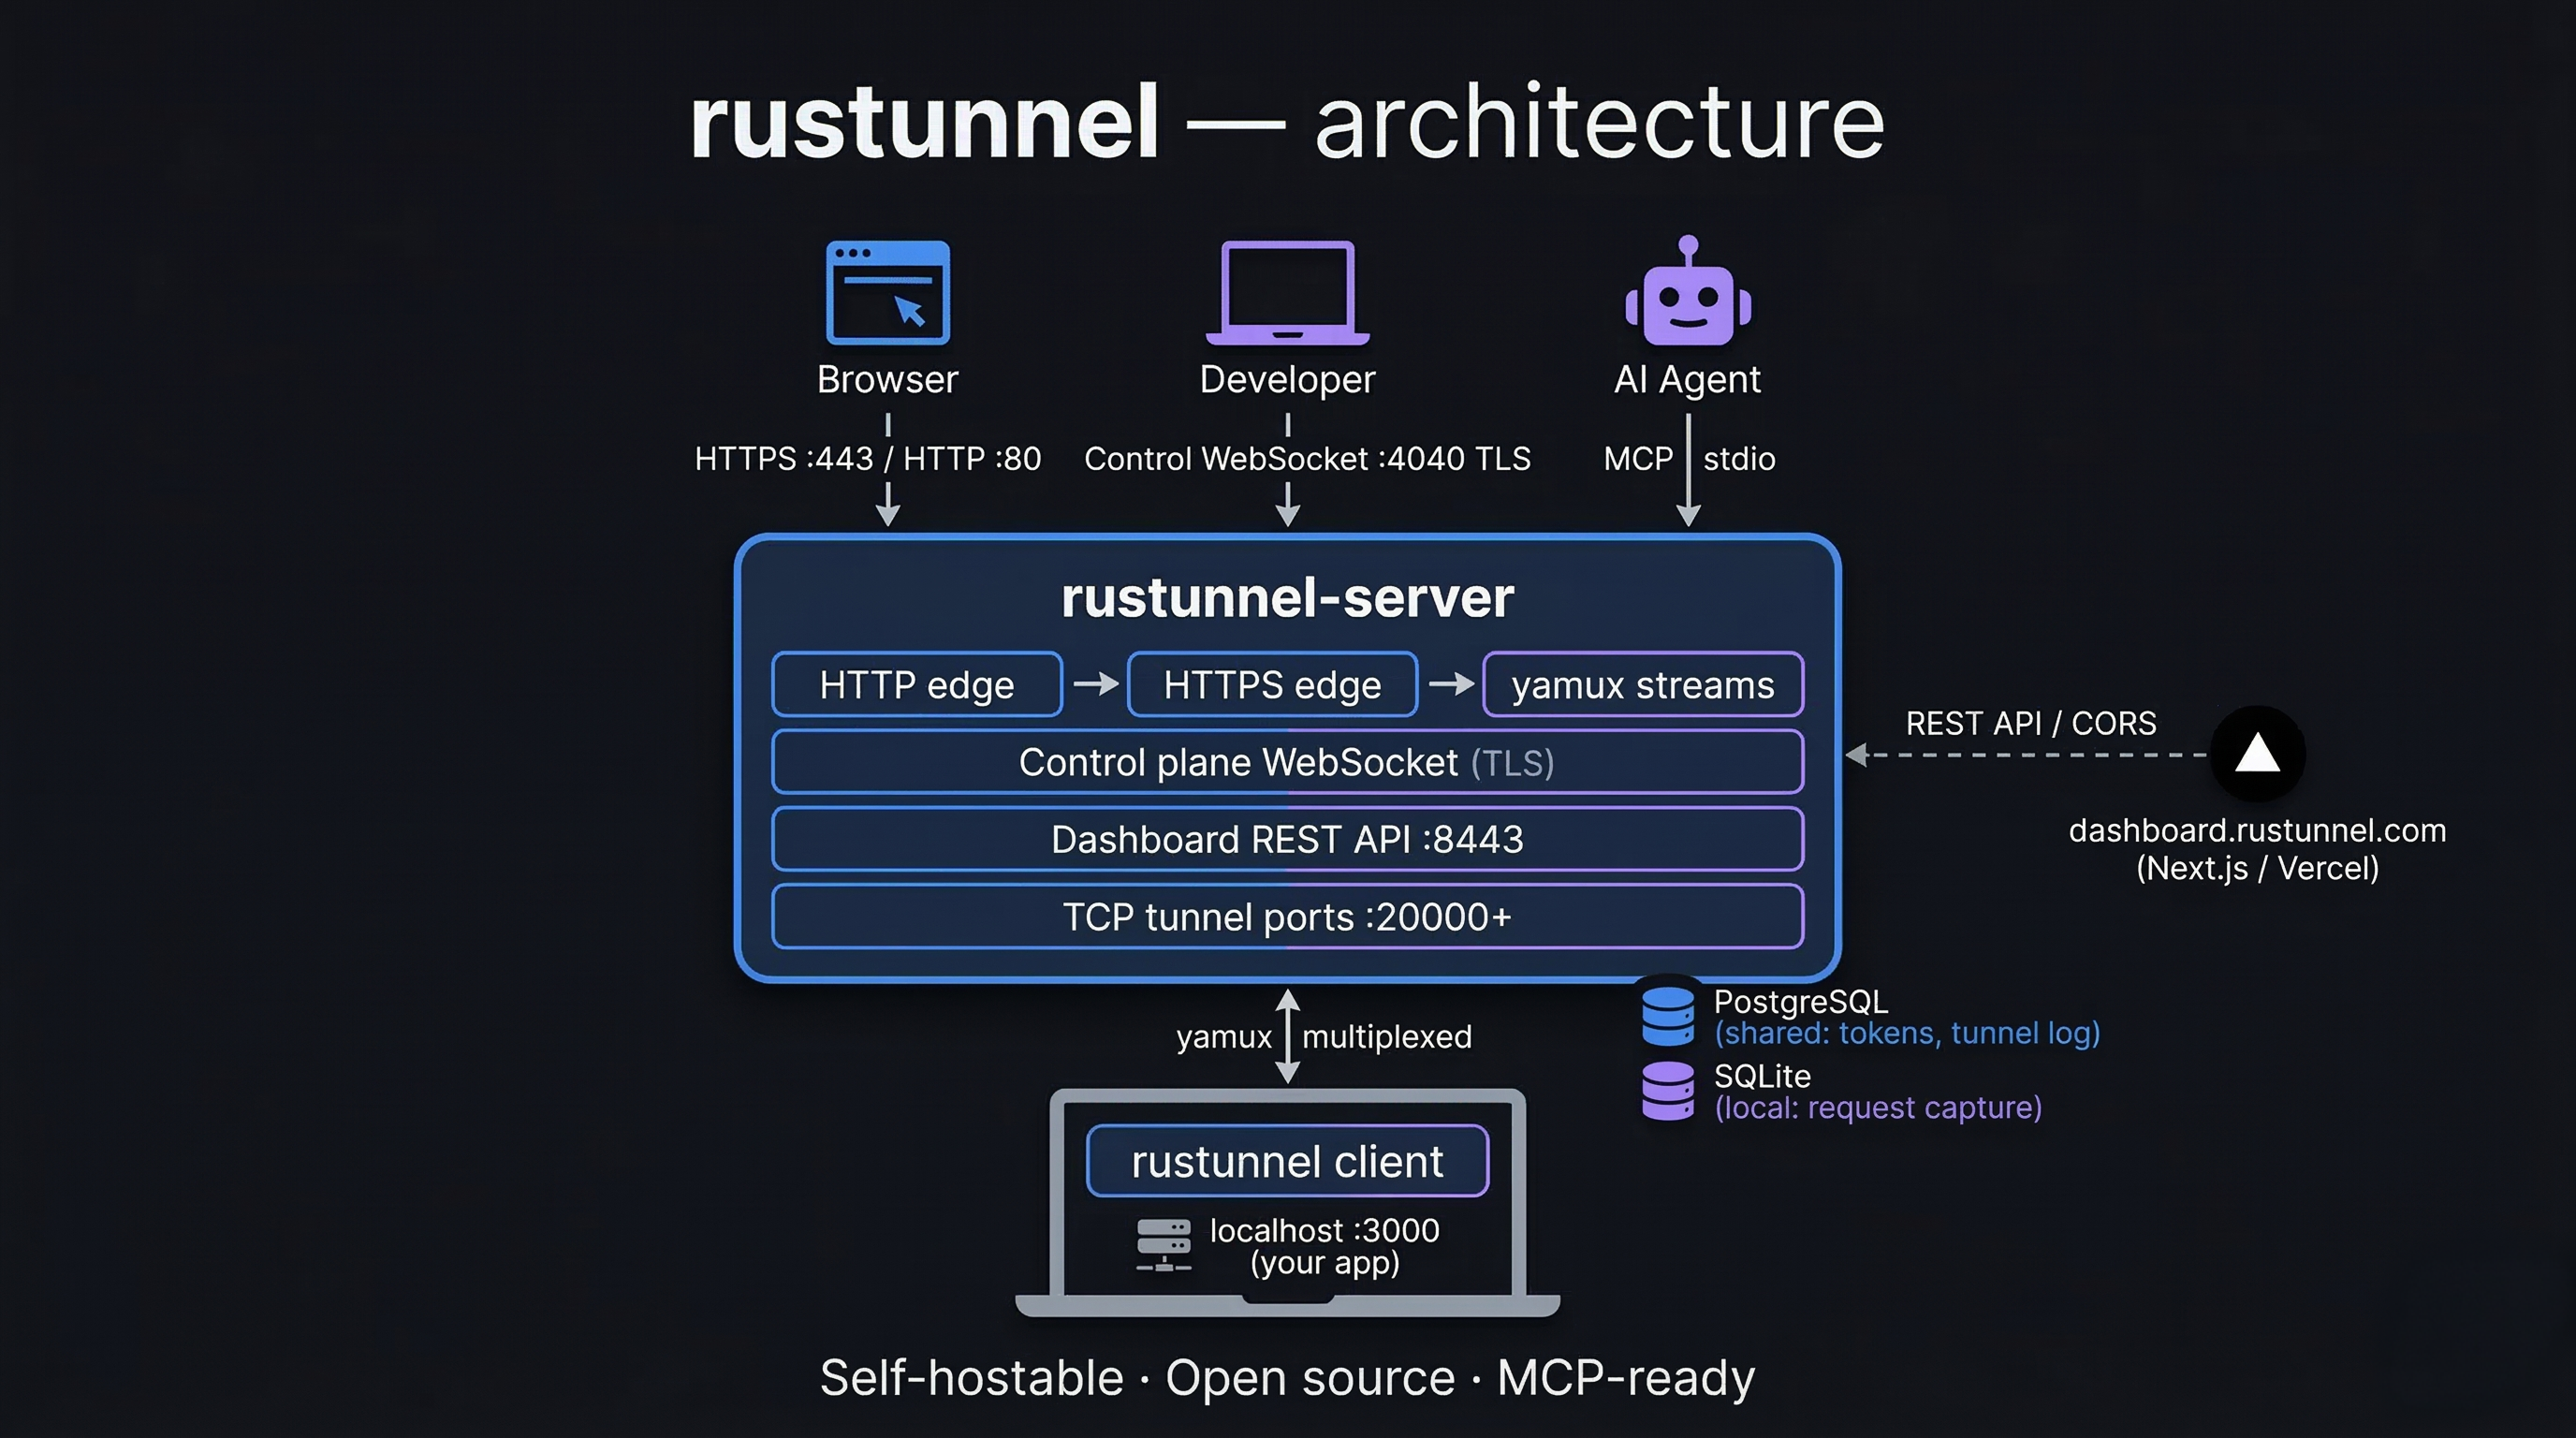
                        ┌──────────────────────────────────────────┐
                        │           rustunnel-server               │
                        │                                          │
Internet ──── :80 ─────▶│  HTTP edge (301 → HTTPS)                 │
Internet ──── :443 ────▶│  HTTPS edge  ──▶ yamux stream ──▶ client │
Client ───── :4040 ────▶│  Control-plane WebSocket (TLS)           │
Browser ──── :8443 ────▶│  Dashboard UI + REST API                 │
Prometheus ─ :9090 ────▶│  Metrics endpoint                        │
Internet ── :20000+ ───▶│  TCP tunnel ports (one per TCP tunnel)   │
                        └──────────────────────────────────────────┘
                                          │ yamux multiplexed streams
                                          ▼
                              ┌─────────────────────┐
                              │   rustunnel client   │
                              │  (developer laptop)  │
                              └──────────┬──────────┘
                                         │ localhost
                                         ▼
                                ┌────────────────┐
                                │  local service  │
                                │  e.g. :3000    │
                                └────────────────┘
Requirements
To build
| Requirement | Version | Notes |
|---|---|---|
| Rust toolchain | 1.76+ | Install via rustup |
pkg-config |
any | Needed by reqwest (TLS) |
libssl-dev |
any | On Debian/Ubuntu: apt install libssl-dev |
| Node.js + npm | 18+ | Only needed to rebuild the dashboard UI |
To run the server in production
| Requirement | Notes |
|---|---|
| Linux (Ubuntu 22.04+) | systemd service included |
| TLS certificate + private key | PEM format (Let's Encrypt recommended) |
| Public IP / DNS | Wildcard DNS *.tunnel.yourdomain.com → server IP required for HTTP tunnels |
Local development setup
Build
# Clone the repository
git clone https://github.com/joaoh82/rustunnel.git
cd rustunnel

# Compile all workspace crates (debug mode)
cargo build --workspace

# Or use the Makefile shortcut
make build
Run tests
The integration test suite spins up a real server on random ports and exercises auth, HTTP tunnels, TCP tunnels, and reconnection logic. It requires a running PostgreSQL instance.
## Start the local PostgreSQL container (once per machine, persists across reboots)
make db-start

## Full suite (unit + integration)
make test

## With output visible
TEST_DATABASE_URL=postgres://rustunnel:test@localhost:5432/rustunnel_test \
  cargo test --workspace -- --nocapture

#